Using Azkaban
This section covers how to use Azkaban Web UI to create, view and execution your flows.
Create Projects
After logging onto Azkaban, you will see the Projects page. This page will show you a list of all the projects that you have read permissions on. Projects where only group permissions as or those with a role with READ or ADMIN will not appear.
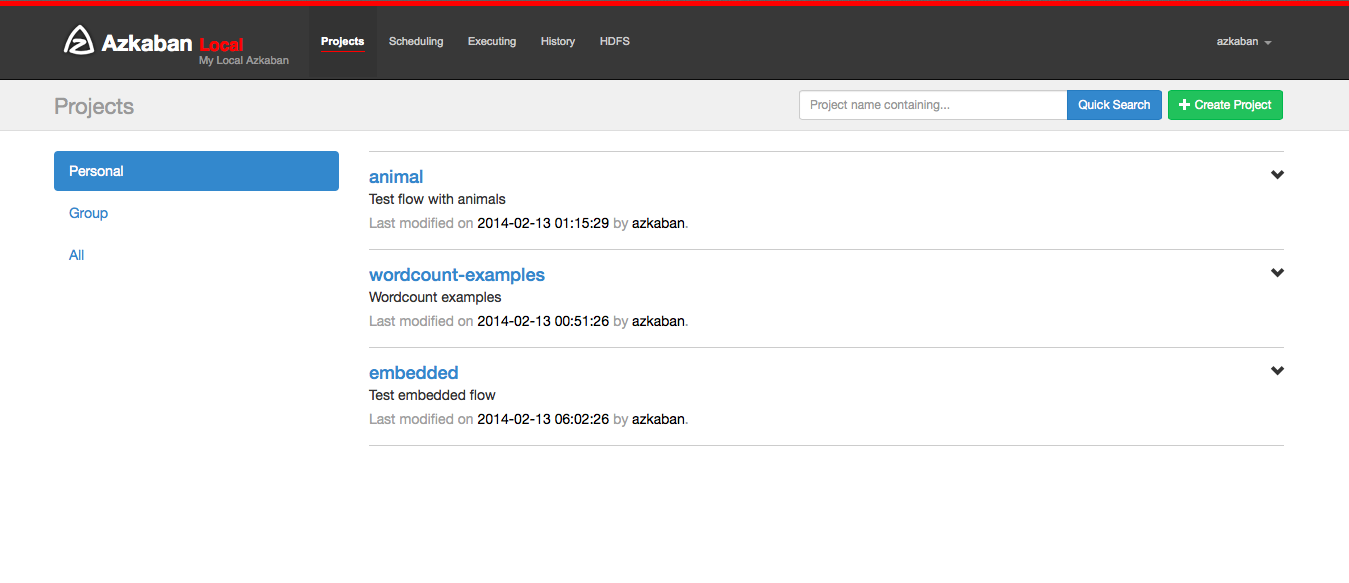
If you are just starting out, the project page may be empty. However you can see all the existing projects by clicking on All Projects .
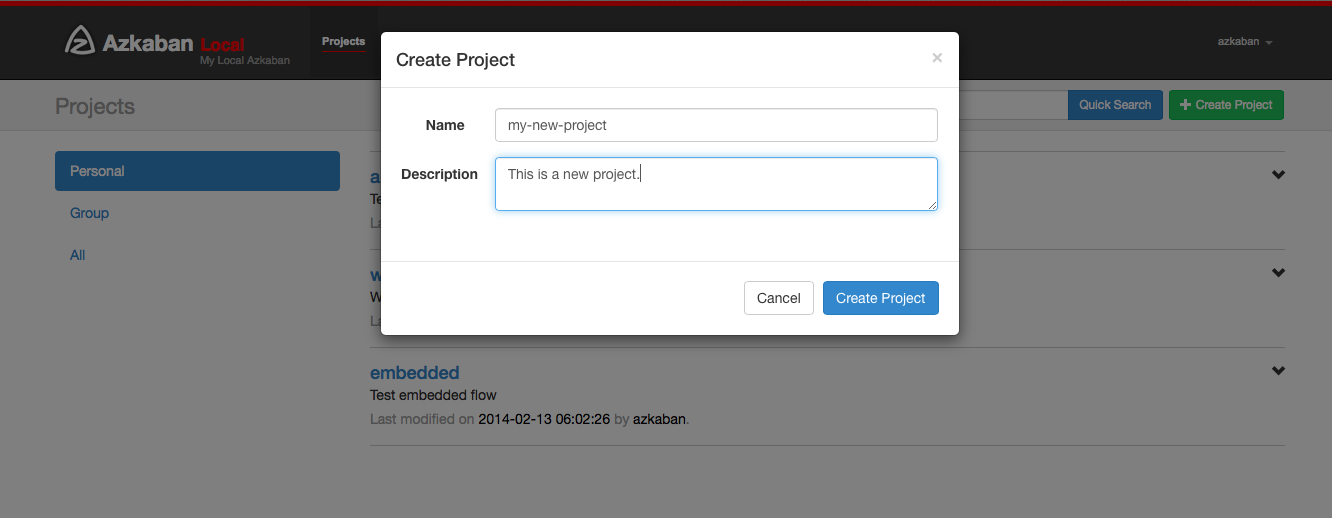
Clicking on Create Projects will pop open a dialog box. Enter in a unique project name and description of the project. The description can be changed in the future, but the project name cannot be. If you don’t see this button, it is likely that the ability to create new projects has been locked down except for users with the proper permissions.
After creating your project, an empty project page will appear. You will automatically be given ADMIN status for this project. Add and remove permissions by clicking on the Permissions Button.
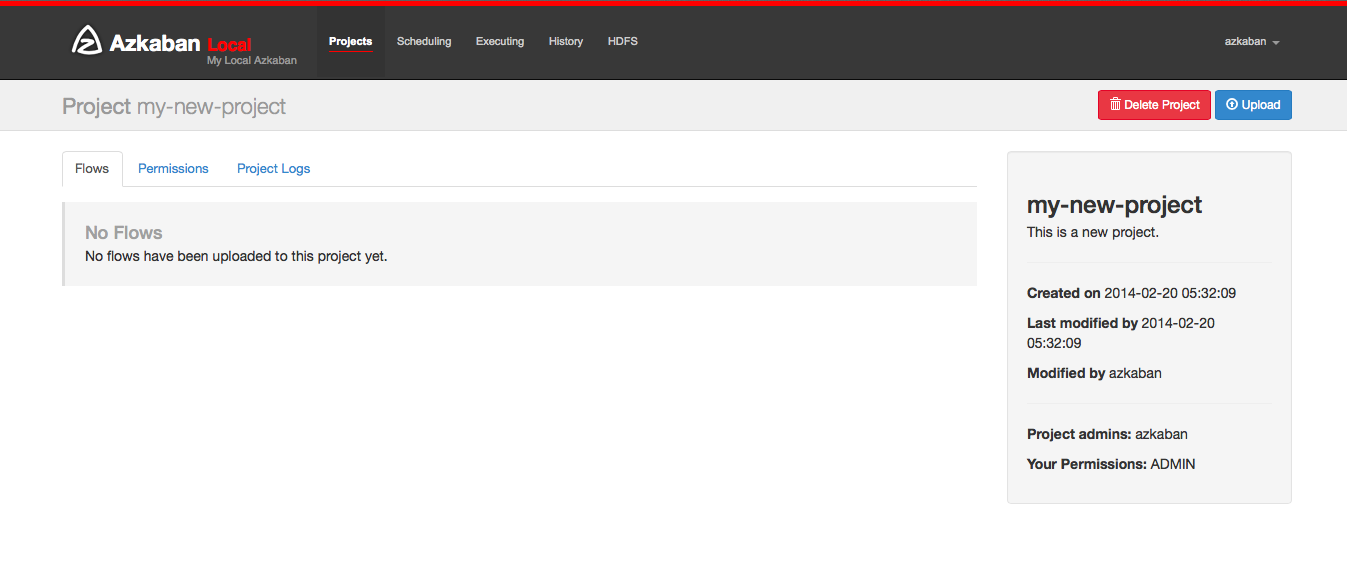
If you have the proper permissions (which you should if you created the project), you can delete the project, update the description, upload files and view the project logs from this page.
Upload Projects
Click on the Upload button. You will see the following dialog.
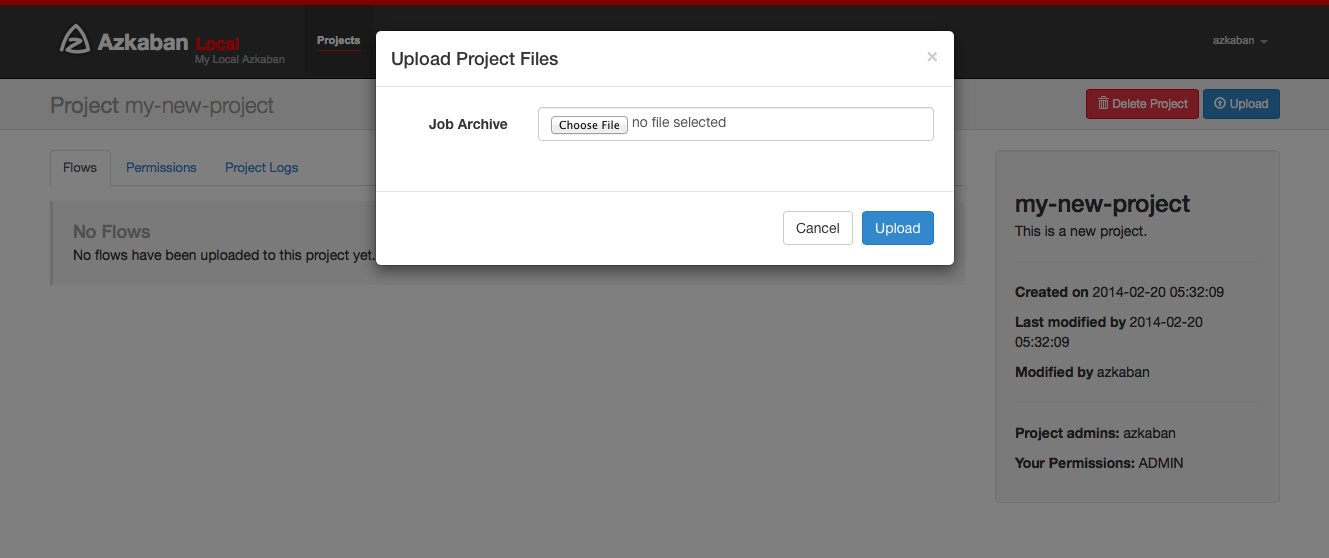
Select the archive file of your workflow files that you want to
upload. Currently Azkaban only supports *.zip files. The zip should
contain the *.job files and any files needed to run your jobs. Job
names must be unique in a project.
Azkaban will validate the contents of the zip to make sure that dependencies are met and that there’s no cyclical dependencies detected. If it finds any invalid flows, the upload will fail.
Uploads overwrite all files in the project. Any changes made to jobs will be wiped out after a new zip file is uploaded.
After a successful upload, you should see all of your flows listed on the screen.
Flow View
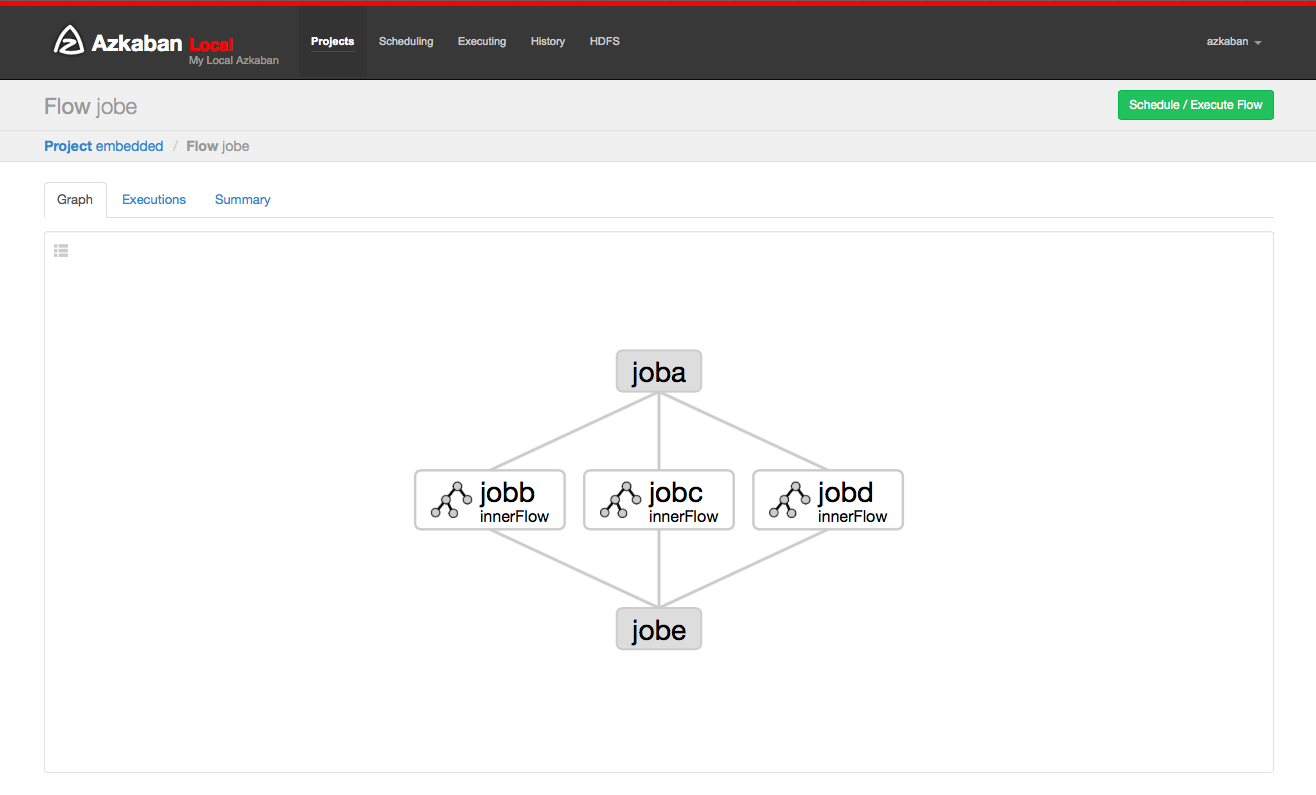
By clicking on the flow link, you can go to the Flow View page. From here, you’ll be shown a graph representation of the flow. The left panel contains a list of jobs in your flow.
Right clicking on either the jobs in the right panel or the nodes in the graph will allow you to open individual jobs. You are also able to Schedule and Execute Flows from this page.
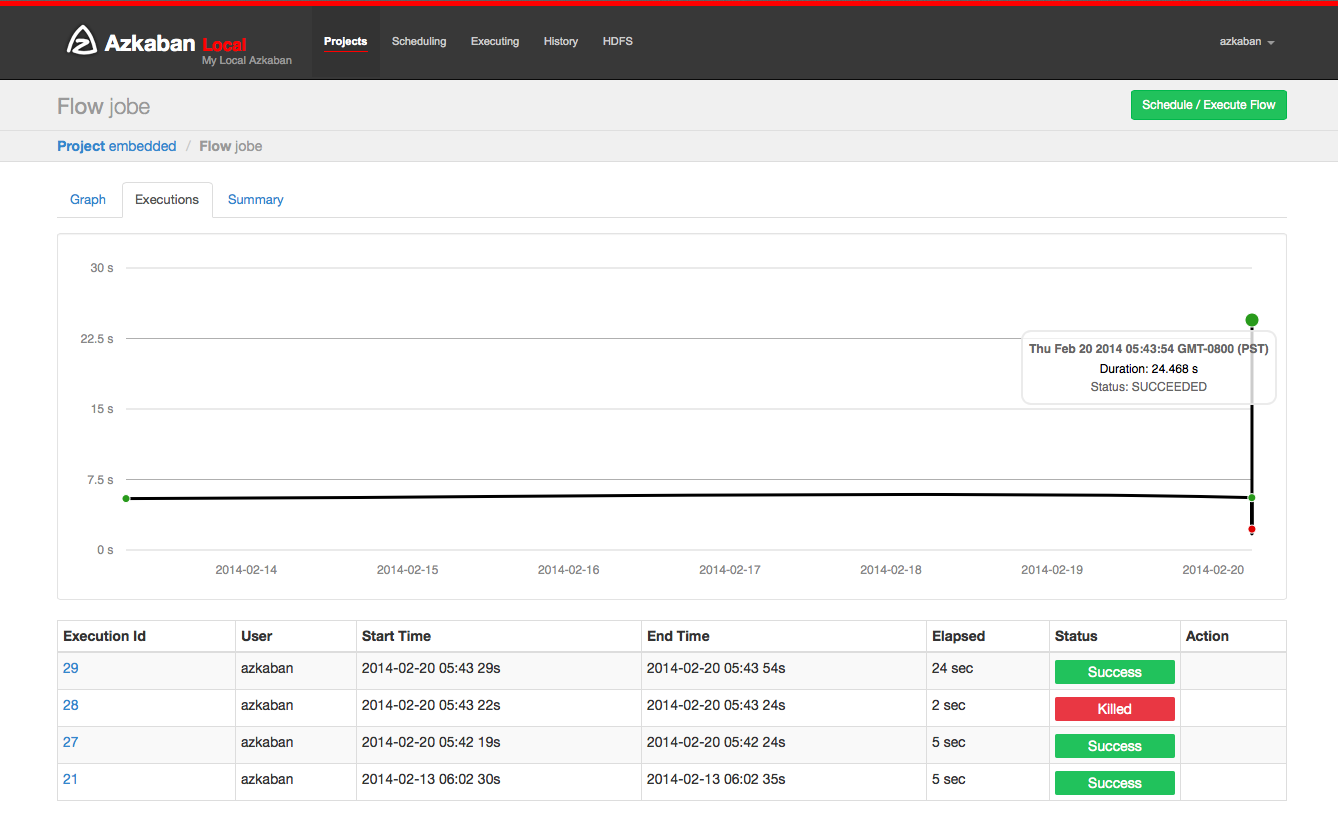
Click on the Executions tab will show you all the previous executions of this flow.
Project Permissions
When a project is created, the creator is automatically given an ADMIN status on the project. This allows the creator to view, upload, change jobs, run flows, delete and add user permissions to the project. An admin can remove other admins, but cannot remove themselves. This prevents projects from being admin-less except when admins are deleted by a user with an admin role.
The permission page is accessible from the project page. On the permissions page, admins can add other users, groups or proxy users to the project.
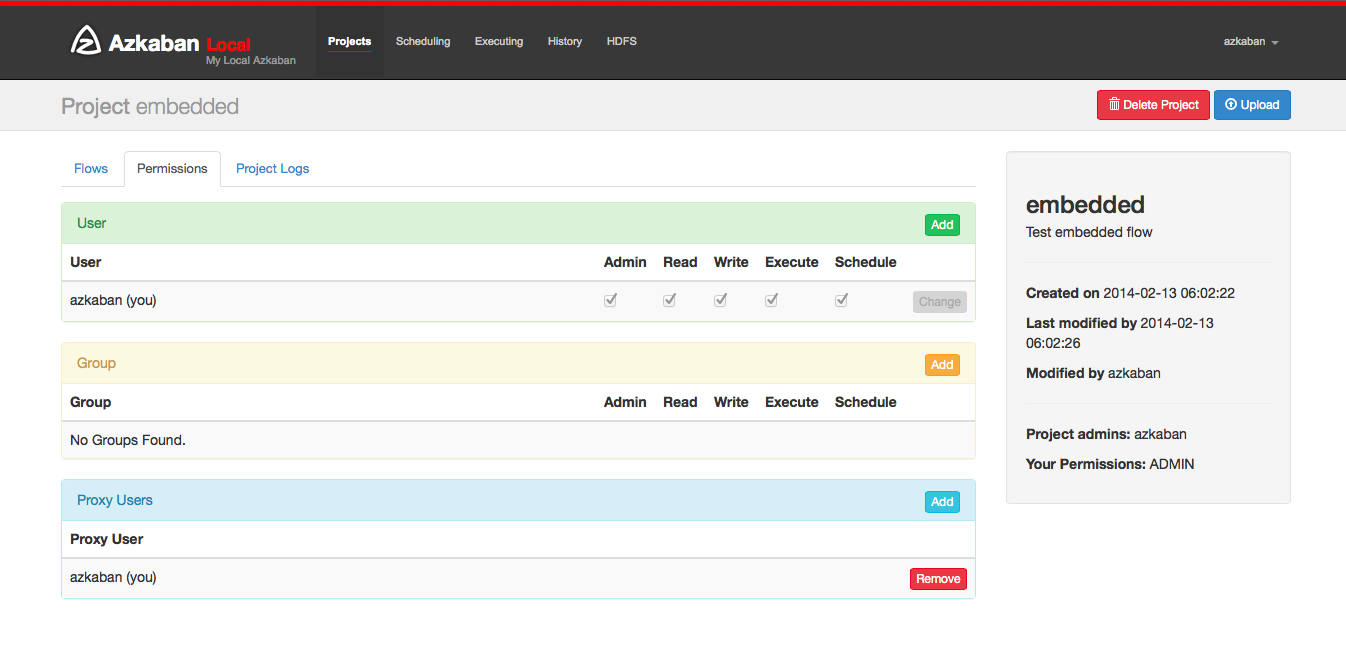
- Adding user permissions gives those users those specified permissions on the project. Remove user permissions by unchecking all of the permissions.
- Group permissions allow everyone in a particular group the specified permissions. Remove group permissions by unchecking all the group permissions.
- If proxy users are turned on, proxy users allows the project workflows to run as those users. This is useful for locking down which headless accounts jobs can proxy to. They are removed by clicking on the ‘Remove’ button once added.
Every user is validated through the UserManager to prevent invalid users from being added. Groups and Proxy users are also check to make sure they are valid and to see if the admin is allowed to add them to the project.
The following permissions can be set for users and groups:
| Permission | Description |
|---|---|
| ADMIN | Allows the user to do anything with this project, as well as add permissions and delete the project. |
| READ | The user can view the job, the flows, the execution logs. |
| WRITE | Project files can be uploaded, and the job files can be modified. |
| EXECUTE | The user is allowed to execute, pause, cancel jobs. |
| SCHEDULE | The user is allowed to add, modify and remove a flow from the schedule. |
Executing Flow
From the Flow View or the Project Page, you can trigger a job to be executed. You will see an executing panel pop-up.
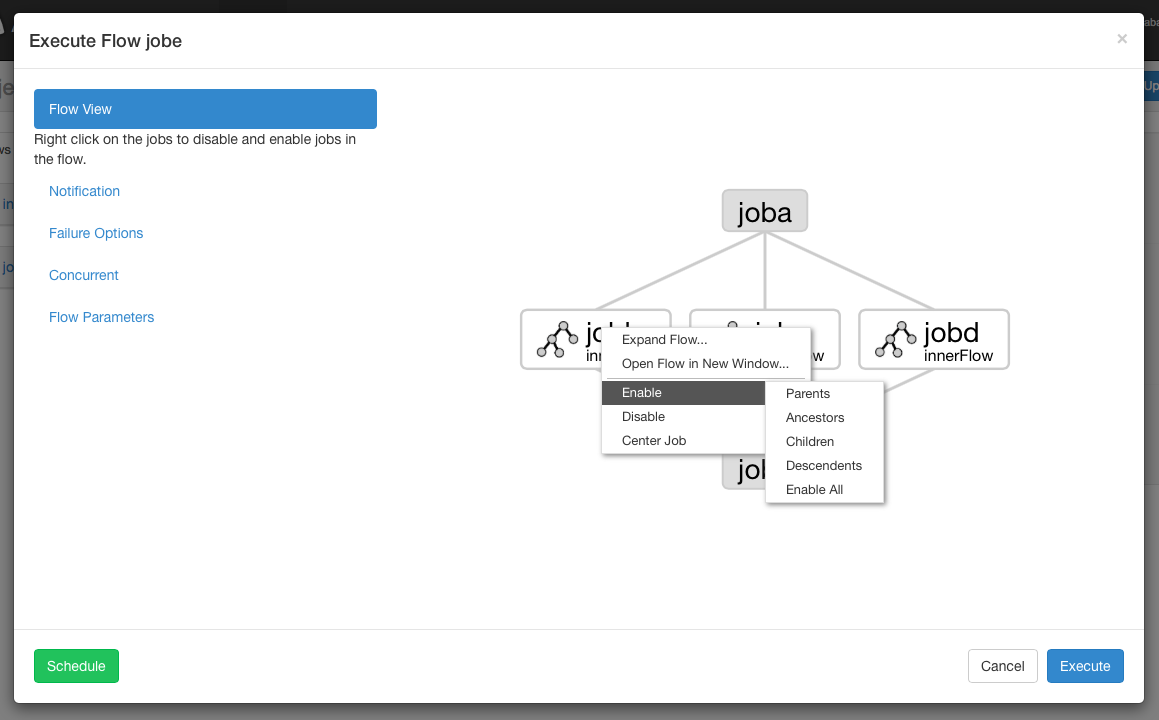
Executing Flow View
From the Flow View panel, you can right click on the graph and disable or enable jobs. Disabled jobs will be skipped during execution as if their dependencies have been met. Disabled jobs will appear translucent.
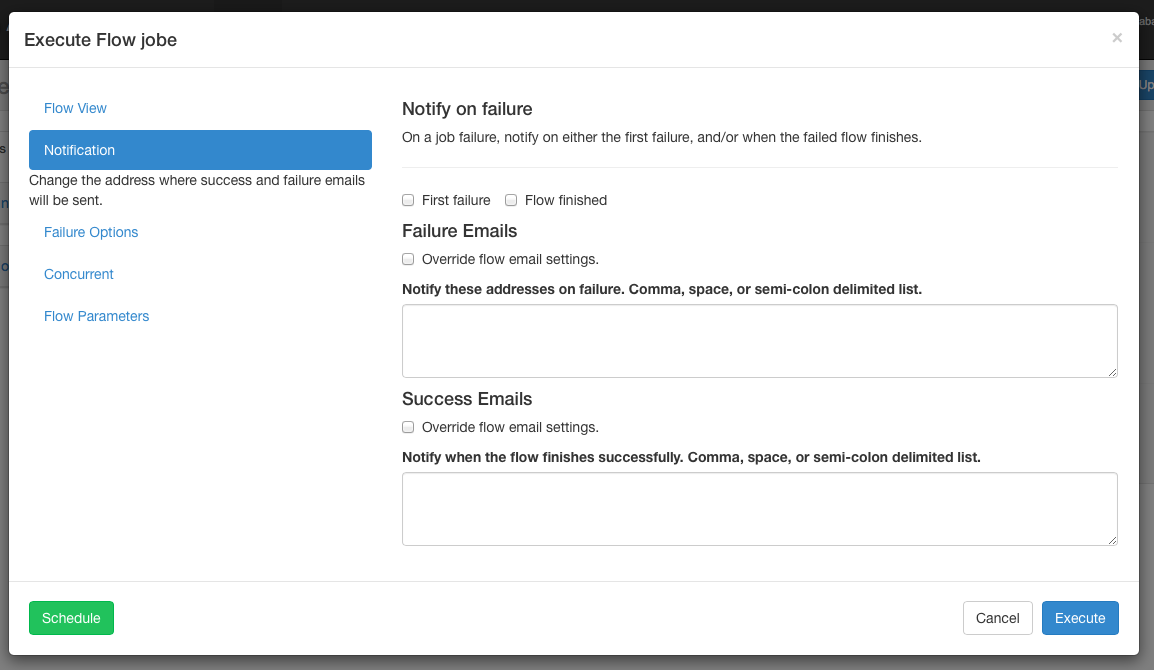
Notification Options
The notification options allow users to change the flow’s success or failure notification behavior.
Notify on Failure
- First Failure - Send failure emails after the first failure is detected.
- Flow Finished - If the flow has a job that has failed, it will send failure emails after all jobs in the flow have finished.
Email overrides
Azkaban will use the default notification emails set in the final job in the flow. If overridden, a user can change the email addresses where failure or success emails are sent. The list can be delimited by commas, whitespace or a semi-colon.
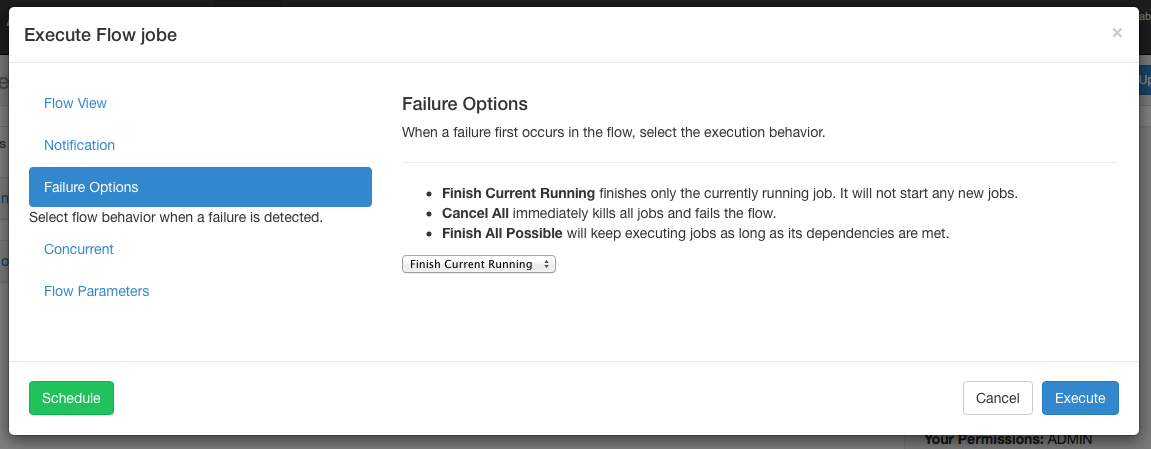
Failure Options
When a job in a flow fails, you are able to control how the rest of the flow will succeed.
- Finish Current Running will finish the jobs that are currently running, but it will not start new jobs. The flow will be put in the FAILED FINISHING state and be set to FAILED once everything completes.
- Cancel All will immediately kill all running jobs and set the state of the executing flow to FAILED.
- Finish All Possible will keep executing jobs in the flow as long as
its dependencies are met. The flow will be put in the
FAILED
FINISHING
state and be set to FAILED once everything completes.
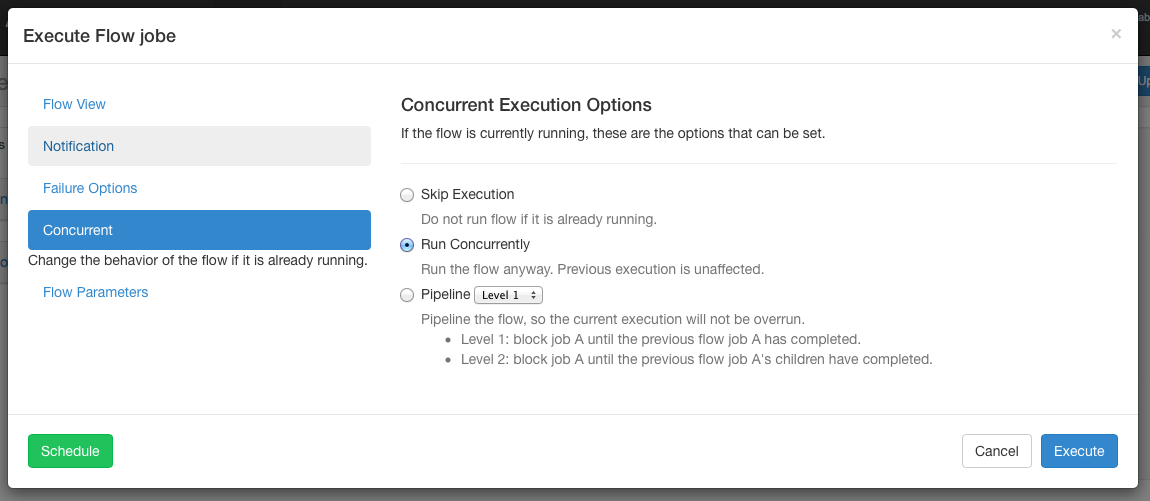
Concurrent Options
If the flow execution is invoked while the flow is concurrently executing, several options can be set.
Skip Execution option will not run the flow if its already running.
Run Concurrently option will run the flow regardless of if its running. Executions are given different working directories.
Pipeline runs the the flow in a manner that the new execution will not overrun the concurrent execution.
- Level 1: blocks executing job A until the previous flow’s job A has completed.
- Level 2: blocks executing job A until the immediate children of the previous flow’s job A have completed. This is useful if you need to run your flows two steps behind an already executing flow, as opposed to Level 1 which executes one step behind. If the child node is a sub-flow, Level 2 only blocks on the immediate start node(s) inside the sub-flow. This does not wait for the entire sub-flow.
- Level 3: blocks all jobs until the previous flow has completed.
Runtime Properties
Runtime Properties allow users to override properties temporarily.
Note: This feature was previously known as Flow Parameters.
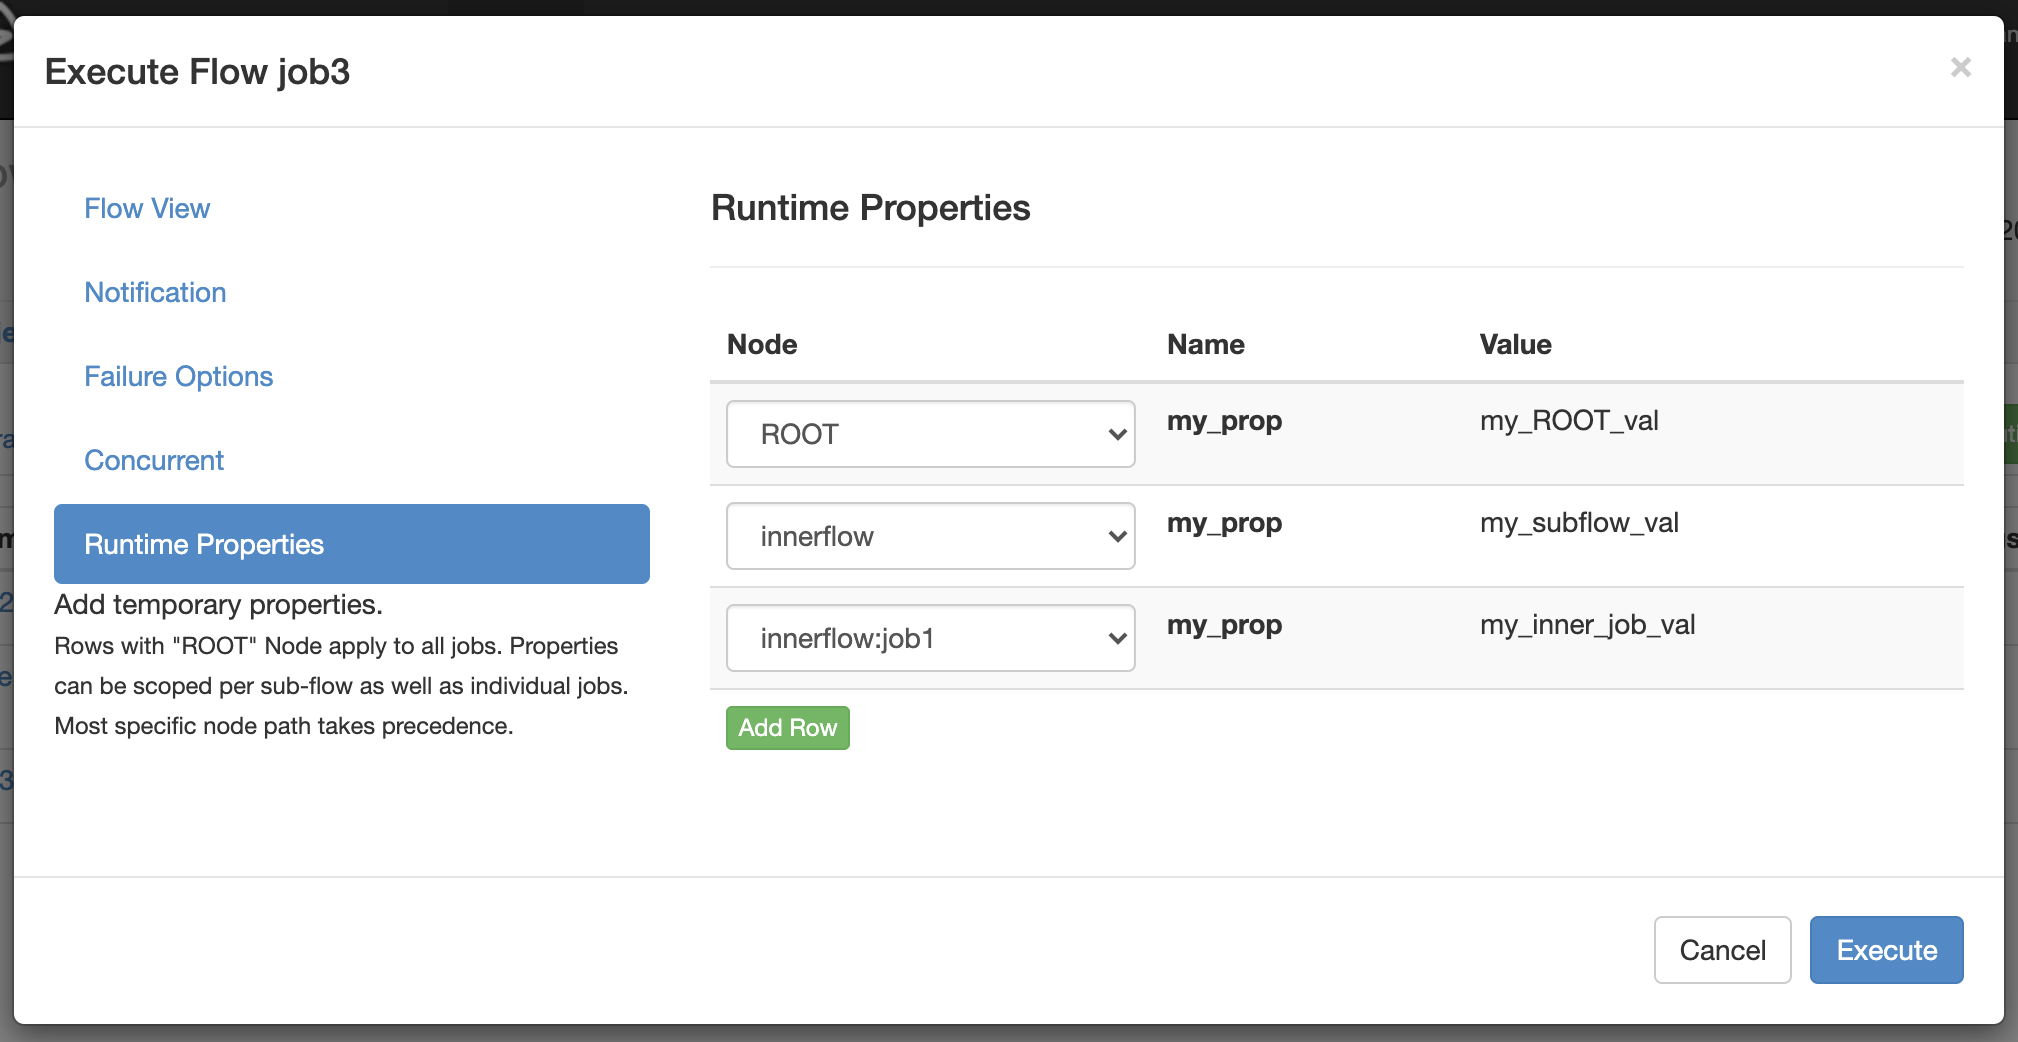
The scope of each runtime property is defined by the Node selection. Rows with ROOT Node apply to all jobs in the flow. Properties can be scoped per sub-flow as well as individual jobs. Most specific node path takes precedence.
Overrides are applied depending on the Azkaban server configuration property azkaban.executor.runtimeProps.override.eager:
- azkaban.executor.runtimeProps.override.eager=false (default):
- Runtime properties don’t override predefined properties from a more specific node path. In particular runtime properties at flow level don’t override predefined properties at job level.
- azkaban.executor.runtimeProps.override.eager=true:
- Runtime properties (also those that are set on a parent node or at flow level) have higher precedence than predefined properties.
Executions
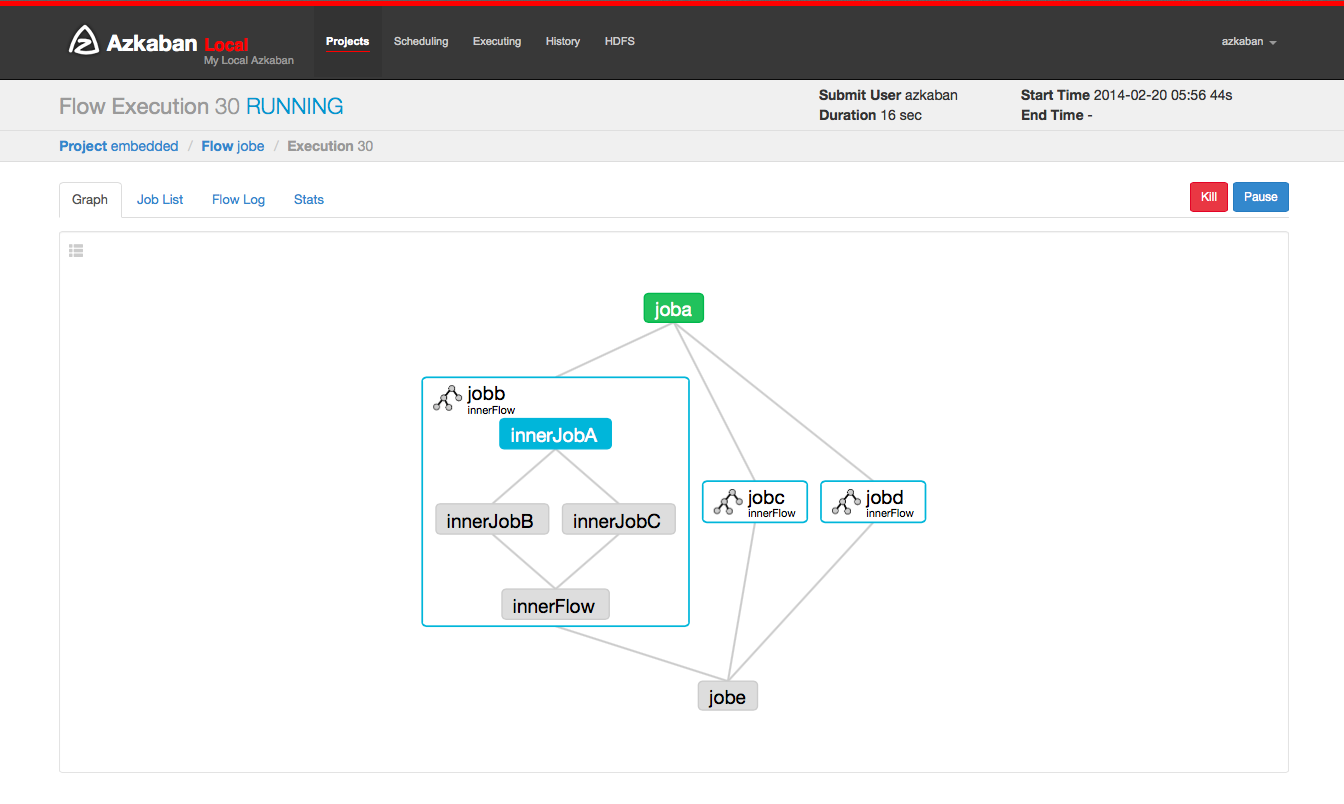
Flow Execution Page
After executing a flow you will be presented the Executing Flow page. Alternatively, you can access these flows from the Flow View page under the Executions tab, the History page, or the Executing page.
This page is similar to the Flow View page, except it shows status of running jobs.
Selecting the Job List will give a timeline of job executions. You can access the jobs and job logs directly from this list.
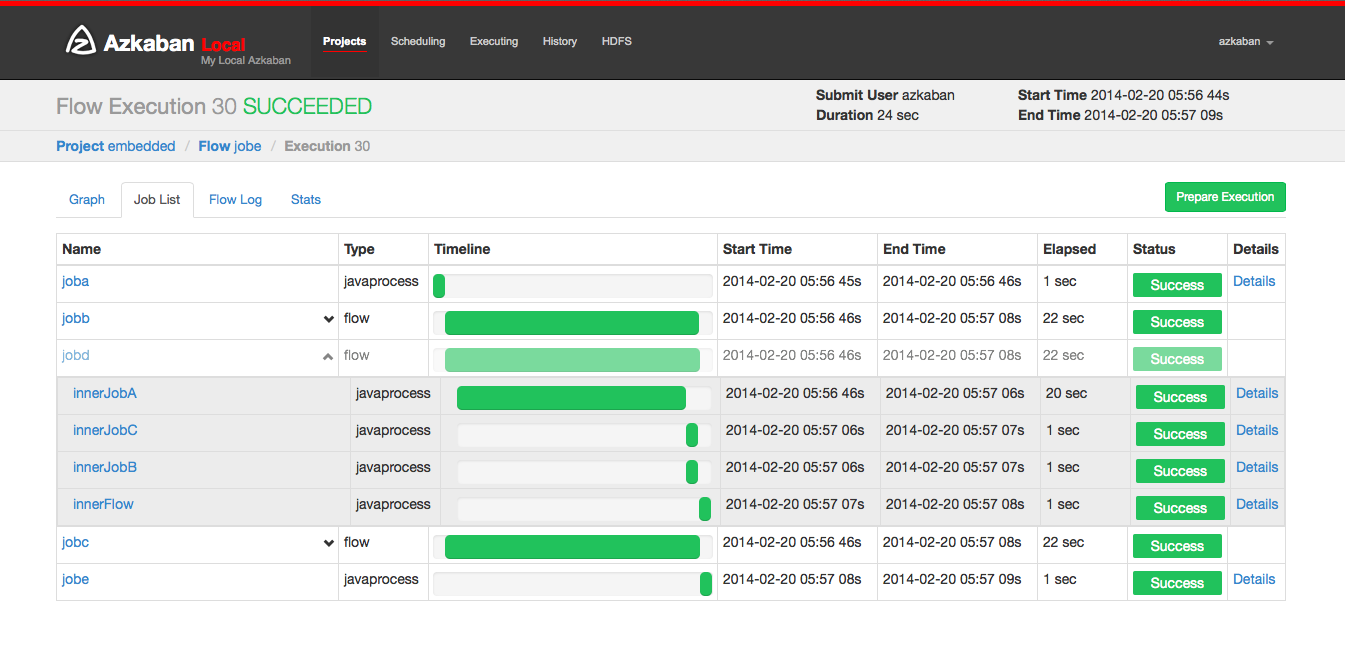
This page will auto update as long as the execution is not finished.
Some options that you are able to do on execution flows include the following:
- Cancel - kills all running jobs and fails the flow immediately. The flow state will be KILLED.
- Pause - prevents new jobs from running. Currently running jobs proceed as usual.
- Resume - resume a paused execution.
- Retry Failed - only available when the flow is in a FAILED FINISHING state. Retry will restart all FAILED jobs while the flow is still active. Attempts will appear in the Jobs List page.
- Prepare Execution - only available on a finished flow, regardless of success or failures. This will auto disable successfully completed jobs.
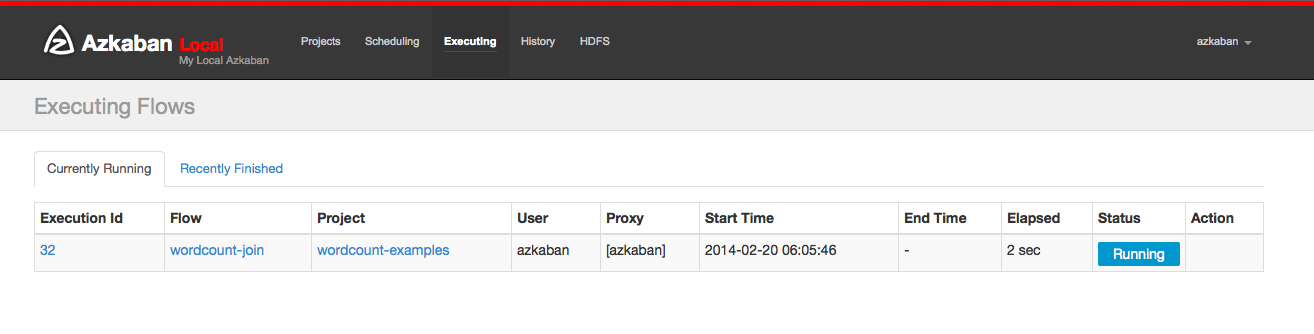
Executing Page
Clicking on the Executing Tab in the header will show the Execution page. This page will show currently running executions as well as recently finished flows.
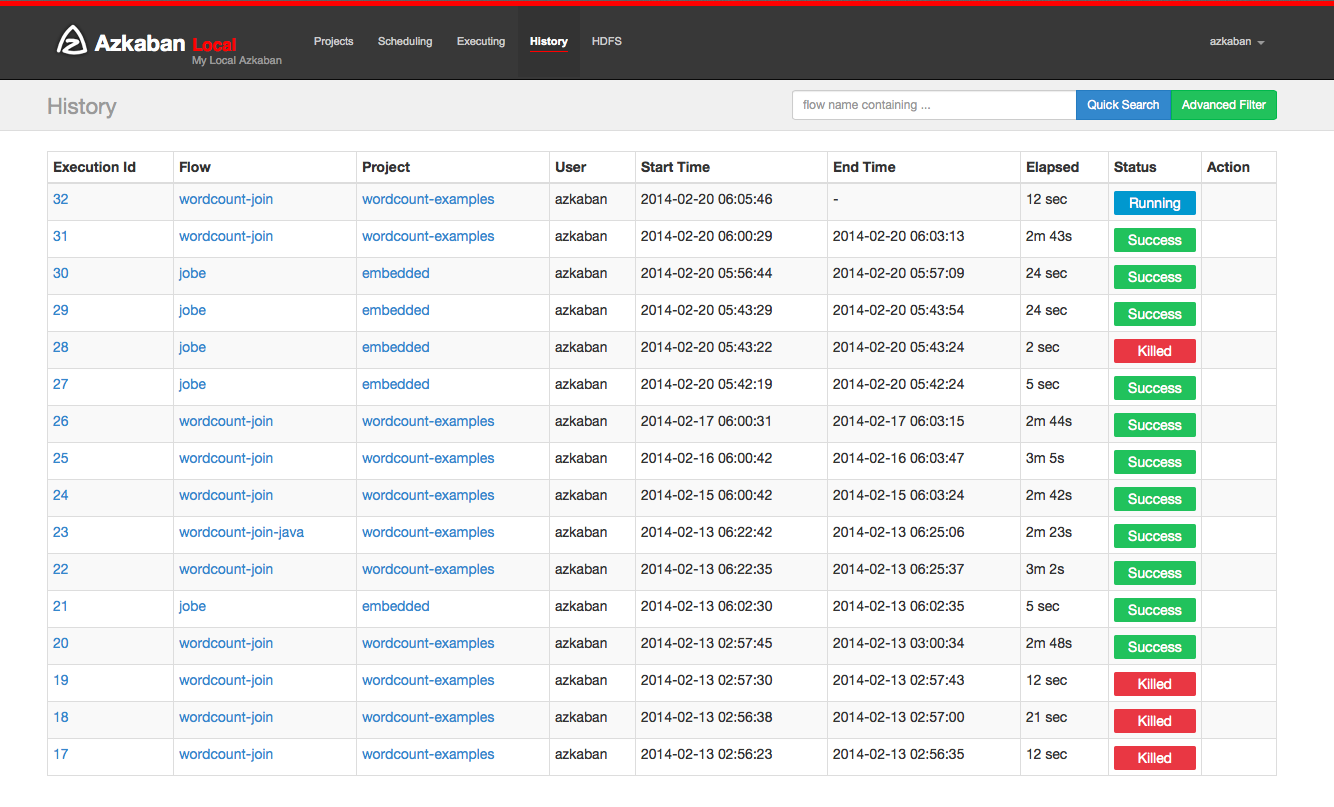
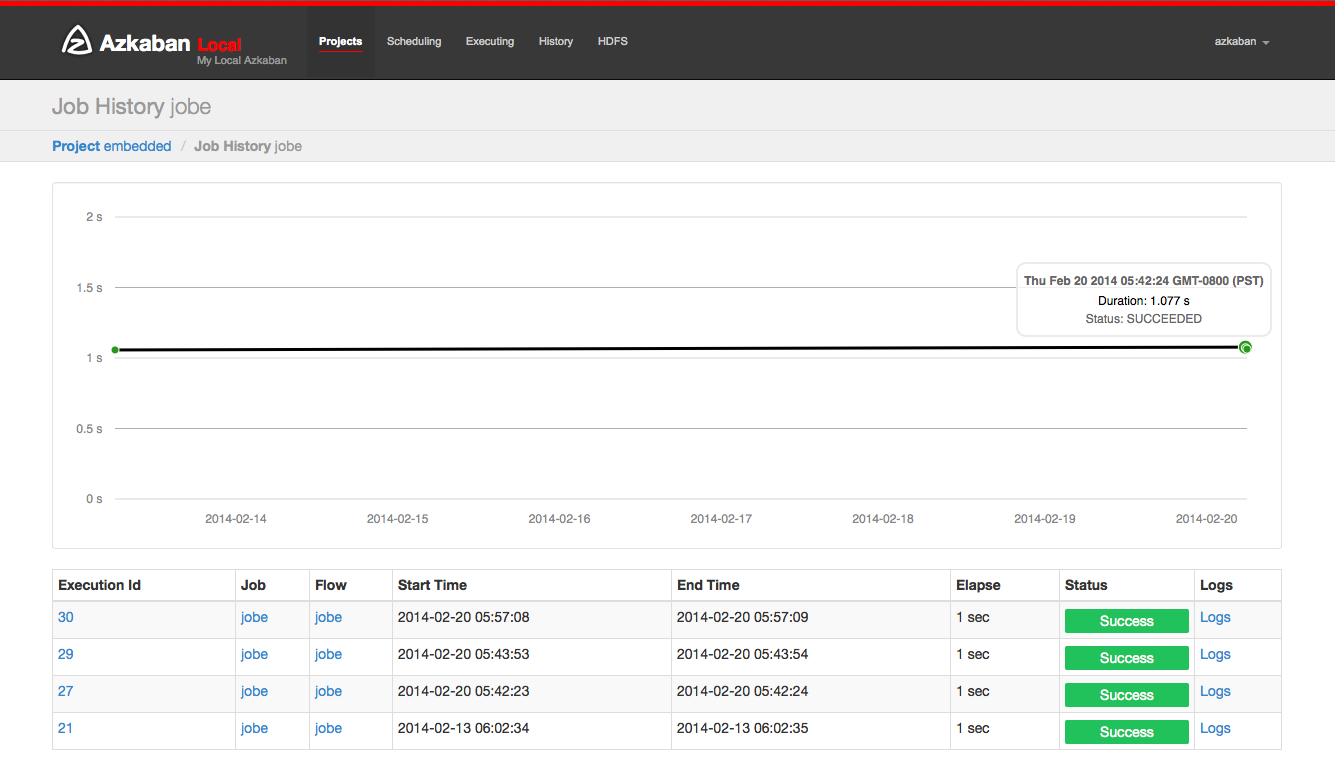
History Page
Currently executing flows as well as completed executions will appear in the History page. Searching options are provided to find the execution you’re looking for. Alternatively, you can view previous executions for a flow on the Flow View execution tab.
Schedule Flow
From the same panel that is used to execute flow, flows can be scheduled by clicking on the Schedule button.
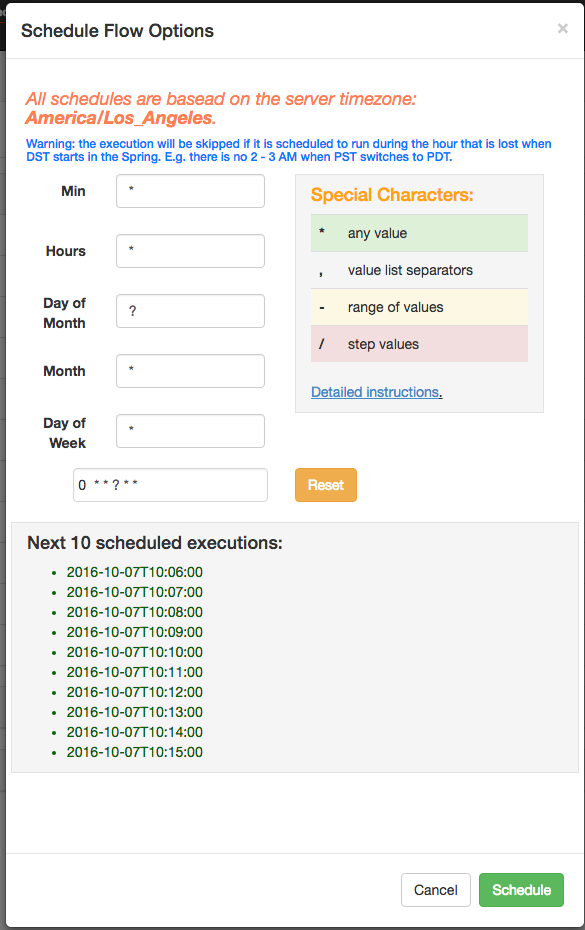
Any flow options set will be preserved for the scheduled flow. For instance, if jobs are disabled, then the scheduled flow’s jobs will also be disabled.
With new flexible scheduling feature in Azkaban 3.3, User are able to define a cron job following Quartz syntax. One important change different from Quartz or cron is that Azkaban functions at the minute granularity at most. Therefore, second field in UI is labeled as a static “0”. The Flexible Schedule Wiki explains the details how to use.
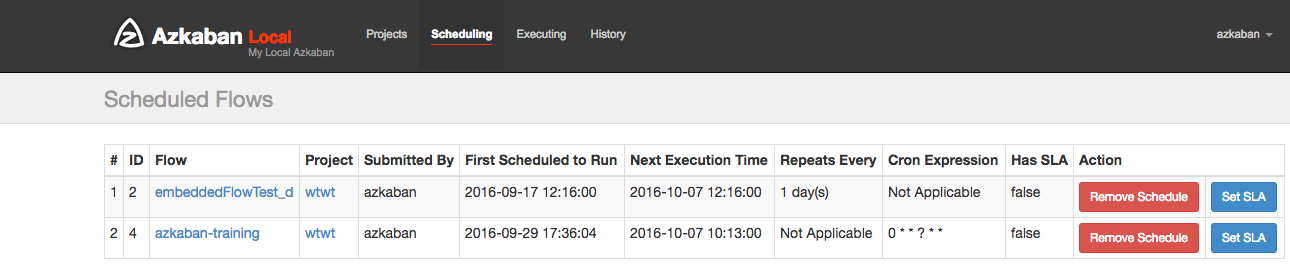
After scheduling, it should appear on the schedule page, where you can remove the scheduled job or set the SLA options.
SLA
To add SLA notification or pre-emption, click on the SLA button. From here you can set the SLA alert emails. Rules can be added and applied to individual jobs or the flow itself. If duration threshold is exceeded, then an alert email can be set or the flow or job can be auto killed. If a job is killed due to missing the SLA, it will be retried based on the retry configuration of that job.

Job Page
Jobs make up individual tasks of a flow. To get to the jobs page, you can right click on a job in the Flow View, the Executing Flow view or the Project Page.
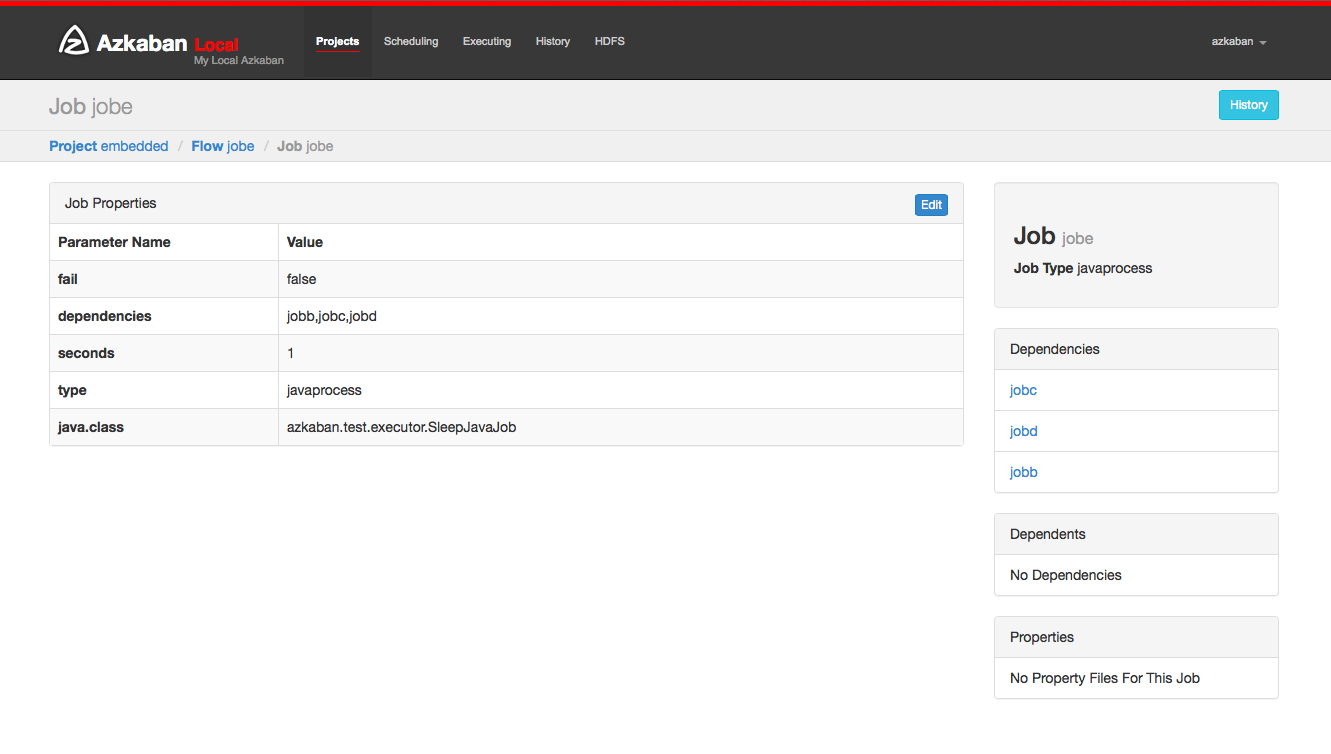
From this page you can see the dependencies and dependents for a job as well as the global properties that the job will use.
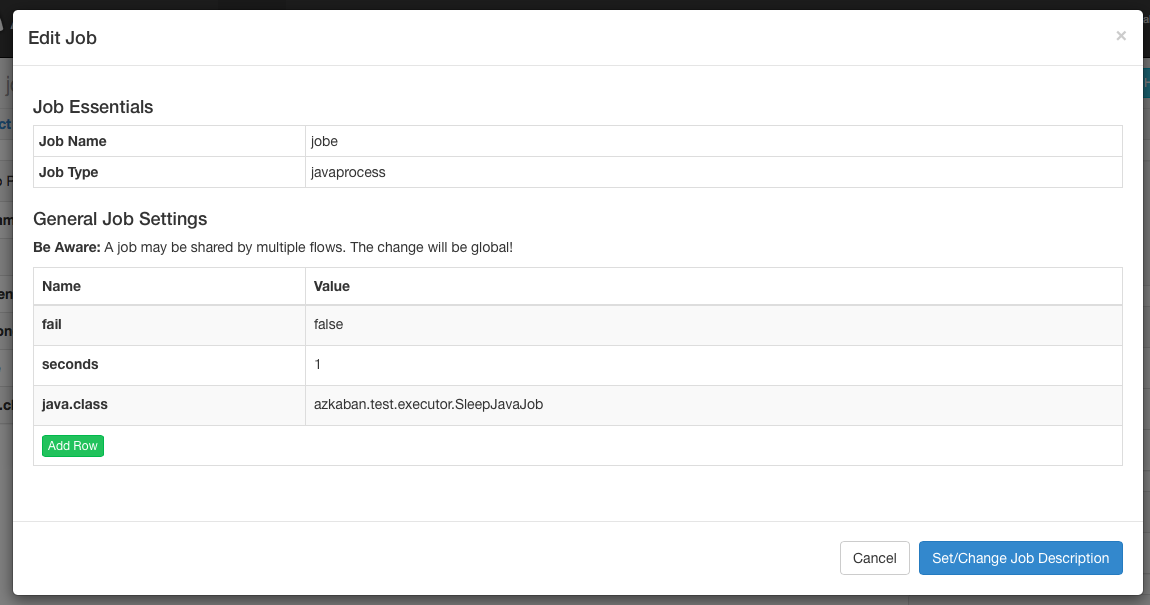
Job Edit
Clicking on Job Edit will allow you to edit all the job properties
except for certain reserved parameters, such as type, and
dependencies. The changes to the parameters will affect an executing
flow only if the job hasn’t started to run yet. These overwrites of
job properties will be overwritten by the next project upload.
Job Details
From an execution page, after clicking “Job List” and then “Details” for one of the jobs, you will arrive at the job details page. This page contains tabs for the “Job Logs” and a “Summary”.
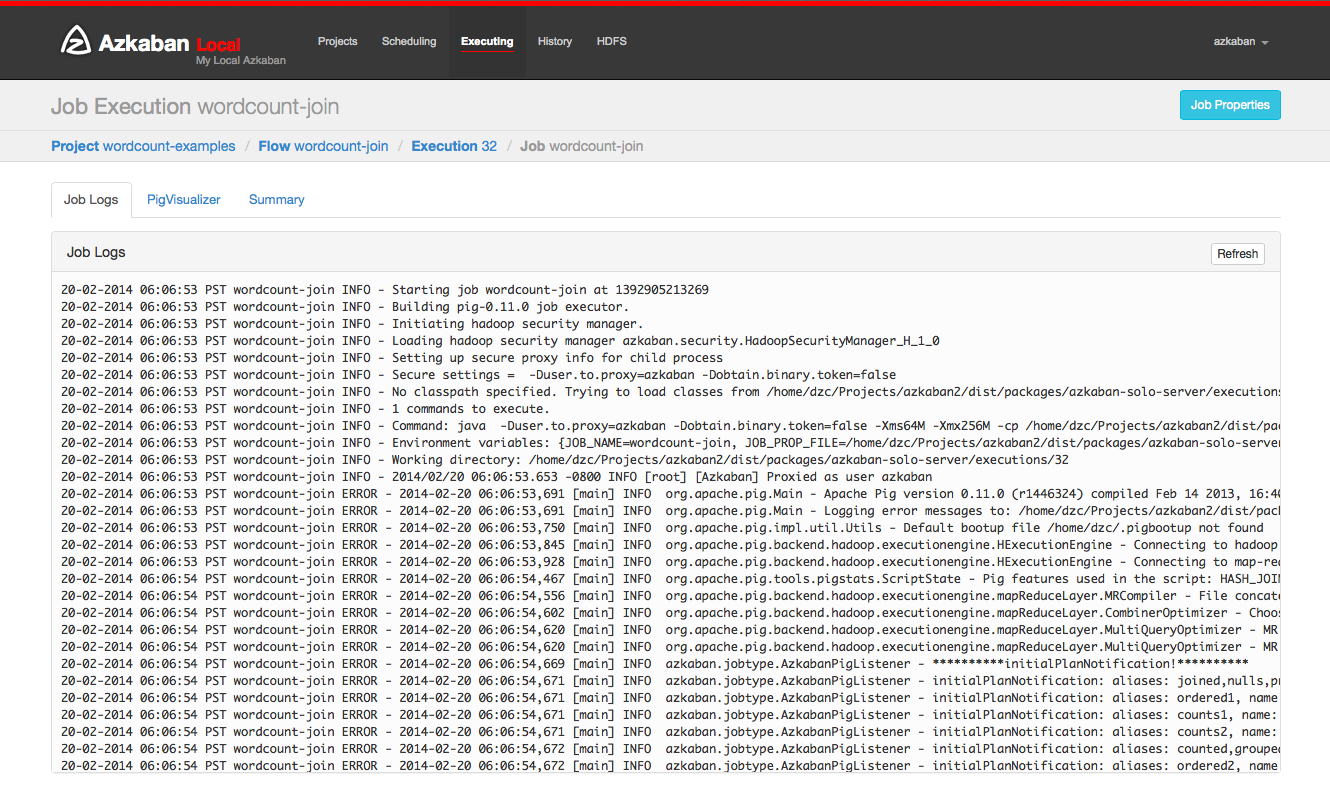
Job Logs
The job logs are stored in the database. They contain all the stdout and stderr output of the job.
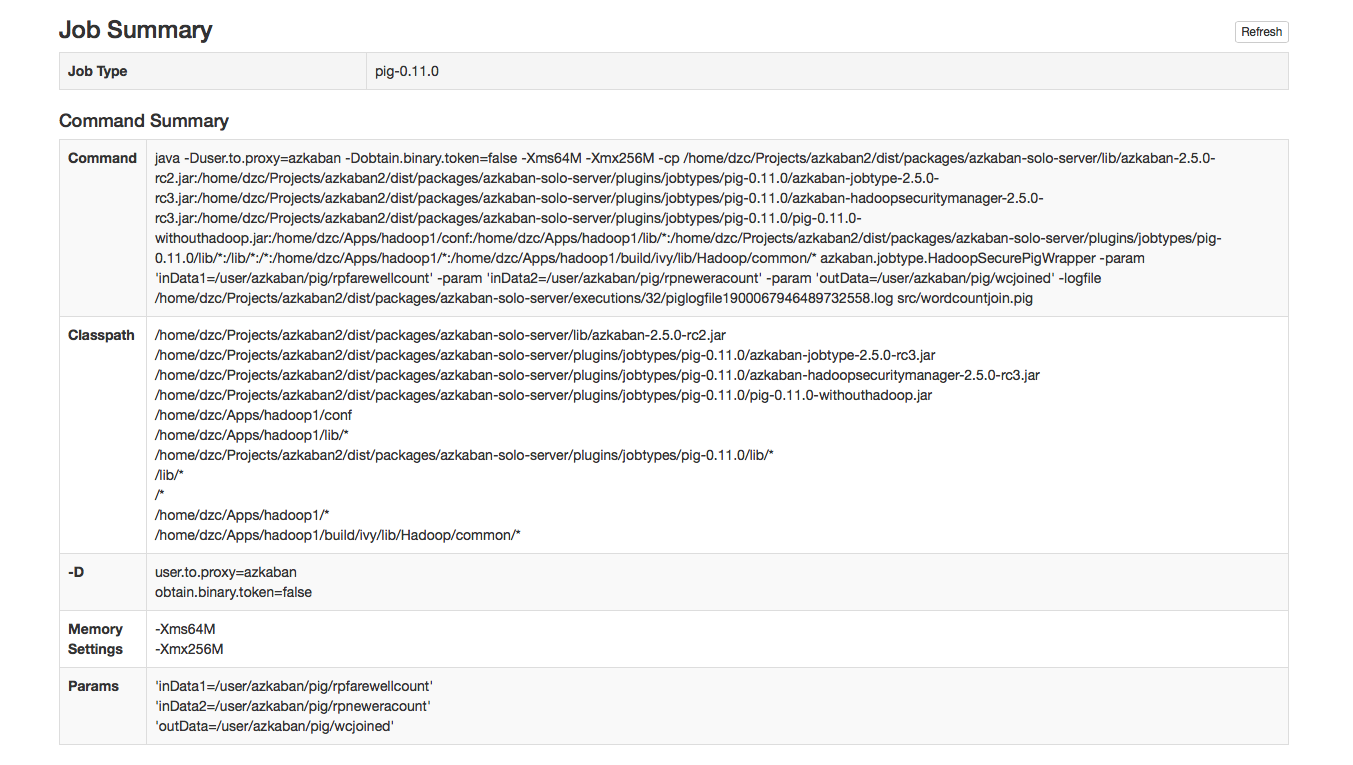
Job Summary
The Job Summary tab contains a summary of the information in the job logs. This includes:
- Job Type - the jobtype of the job
- Command Summary - the command that launched the job process, with fields such as the classpath and memory settings shown separately as well
- Pig/Hive Job Summary - custom stats specific to Pig and Hive jobs
- Map Reduce Jobs - a list of job ids of Map-Reduce jobs that were launched, linked to their job tracker pages